
Sewing machines might look complex initially‚ but for beginners‚ mastering the basics is completely achievable. Once learned‚ you can confidently tackle any sewing project and begin your creative journey today.
Understanding Common Sewing Machine Parts
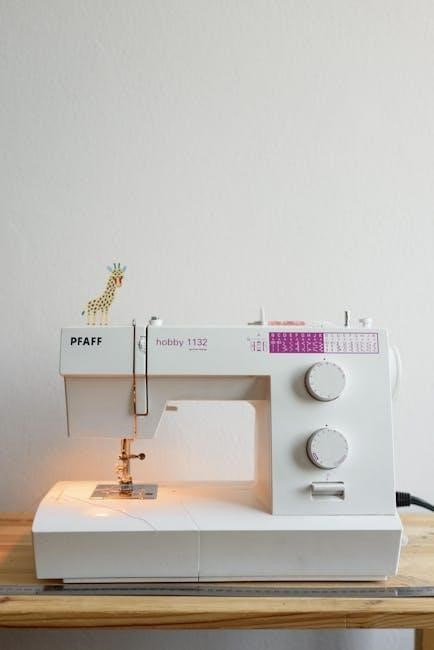
Embarking on your sewing journey begins with a fundamental understanding of your machine’s anatomy. For novices‚ identifying the various components is a crucial first step‚ making subsequent learning much smoother. A comprehensive sewing guide for beginners always emphasizes familiarizing yourself with these essential parts. You’ll encounter the spool pin‚ which securely holds your thread‚ and the bobbin winder‚ indispensable for preparing your lower thread supply. Follow the thread path through various thread guides and the take-up lever‚ vital for proper stitch formation. The tension dial allows adjustments for balanced stitches‚ while the needle‚ the heart of the machine‚ performs the actual stitching. Below it‚ the presser foot holds fabric firmly‚ working in conjunction with the feed dogs to move material evenly. Don’t forget the stitch plate‚ providing a smooth surface‚ and the handwheel for manual control. Additionally‚ locate the foot pedal for speed management and the reverse stitch lever for securing seams. Each part plays a specific role‚ contributing to the machine’s overall function. Understanding these parts demystifies the machine‚ transforming it from a complex device into an approachable tool for creative projects. This foundational knowledge is key before you delve into threading‚ winding‚ or adjusting settings‚ setting you up for confident sewing‚ as highlighted in numerous beginner tutorials.
Setting Up Your Sewing Machine for First Use
To begin your journey with a new machine‚ proper initial setup is paramount. First‚ find a stable‚ well-lit surface‚ ensuring ample space around your workspace for comfortable operation and fabric handling. Unpack your machine carefully‚ removing all protective packaging. Next‚ connect the power cord to the machine and then to a wall outlet. Similarly‚ attach the foot pedal to its designated port on the machine‚ placing it conveniently on the floor where you can operate it comfortably. Before proceeding‚ consult your specific machine’s manual; it contains crucial‚ model-specific instructions for initial power-up and safety checks. Turn on the power switch‚ usually located on the side or back‚ to illuminate your workspace and prepare the machine. Briefly confirm your needle is correctly inserted and secure‚ though detailed needle changing will come later. Having small fabric scraps nearby for initial tests is also a good idea; This methodical approach to setup ensures you’re ready to move forward confidently‚ laying the groundwork for mastering subsequent techniques like winding a bobbin and threading‚ which will be covered shortly. This initial preparation is a vital step for any beginner aiming to sew with confidence.

Mastering Essential Sewing Machine Techniques
Mastering essential sewing machine techniques is crucial for novices. Learn proper threading‚ winding bobbins‚ adjusting tension‚ and sewing your first stitches with confidence. These fundamental skills will unlock countless creative projects and ensure successful outcomes for any beginner.
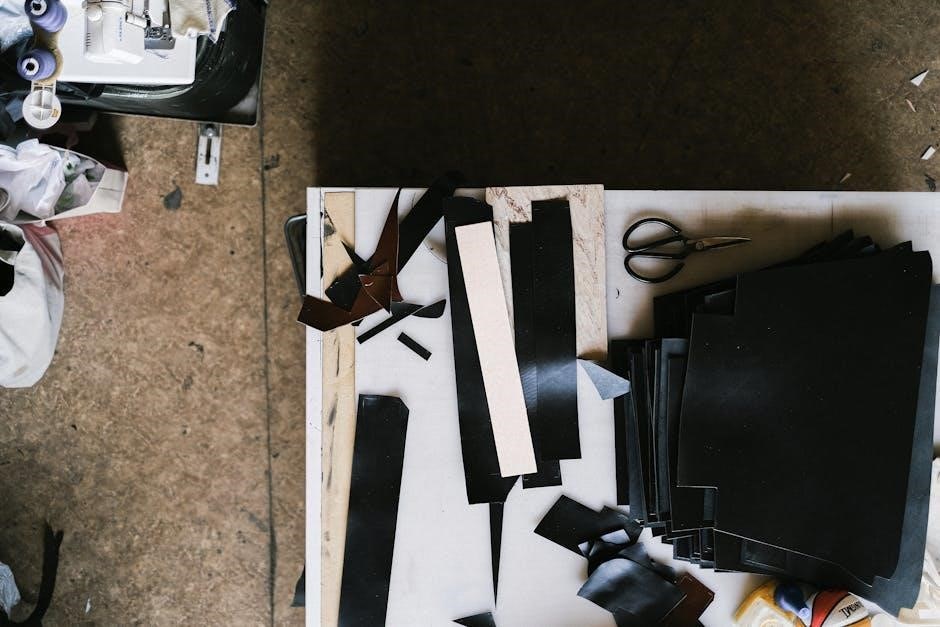
How to Wind a Bobbin Correctly
Winding a bobbin correctly is a foundational skill for any sewing machine novice‚ ensuring smooth stitching and preventing frustrating thread tangles. Many beginner sewing machine tutorials emphasize this crucial step. To begin‚ place your chosen spool of thread onto the spool pin‚ making sure it unwinds smoothly. Next‚ guide the thread through the machine’s designated bobbin winding tension disc or guide. This step is vital for an evenly wound bobbin‚ which directly impacts your stitch quality. Take your empty bobbin and place it securely onto the bobbin winder spindle‚ often located on the top or front of your machine. Loop the thread a few times around the bobbin to secure it‚ typically in a clockwise direction. Once the thread is secure‚ push the bobbin winder spindle into the winding position‚ which usually engages a small lever or mechanism. Press the foot pedal gently; the machine will then start winding the thread onto the bobbin. Watch as the bobbin fills‚ aiming for a consistent and neat wrap. Avoid overfilling the bobbin‚ as this can lead to issues with it fitting into the bobbin case or unwinding unevenly. Most machines have an automatic stop feature once the bobbin is full. Once winding is complete‚ release the foot pedal‚ disengage the bobbin winder‚ and carefully cut the thread connecting it to the spool. A properly wound bobbin is compact‚ firm‚ and uniform‚ setting you up for successful sewing projects from the very start. This simple‚ step-by-step process‚ often demonstrated in comprehensive video tutorials‚ is essential for mastering your sewing machine.
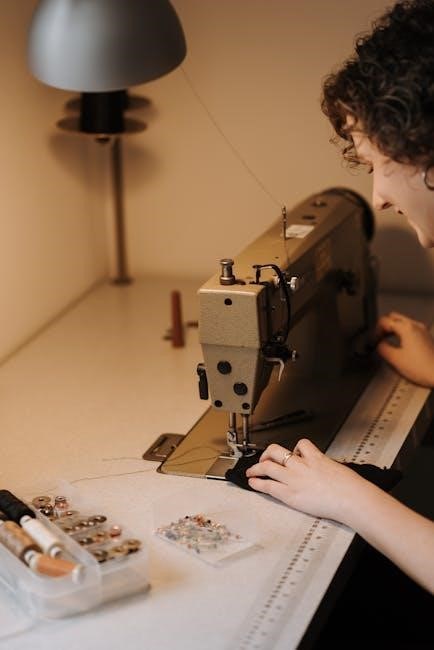
Step-by-Step Sewing Machine Threading
Achieving proper sewing machine threading is a fundamental skill for any beginner‚ vital for smooth operation and preventing common stitching problems. Numerous sewing guides for novices emphasize this crucial step. Start by placing your thread spool onto the spool pin‚ ensuring it unwinds freely. Guide the thread through the machine’s upper path‚ following numbered guides or arrows specific to your model. This involves directing the thread through the upper thread guide‚ down into the tension discs‚ and then upwards through the take-up lever. Correct placement here is essential for maintaining even tension. Continue guiding the thread down towards the needle‚ often through lower thread guides. Finally‚ thread the needle‚ typically from front to back‚ according to your machine’s instructions. Once the upper thread is set‚ address the lower thread. Insert your correctly wound bobbin into its designated case or shuttle compartment. Hold the upper thread‚ then turn the handwheel towards you‚ lowering and raising the needle. This action will catch the bobbin thread‚ forming a loop that you can pull through the needle plate opening. Lastly‚ pull both the upper and bobbin threads together‚ bringing them under the presser foot and extending them towards the back of the machine. This detailed‚ step-by-step process‚ often clearly demonstrated in various video tutorials‚ is indispensable for beginners to master threading‚ enabling confident stitching and setting the stage for successful sewing projects.
Adjusting Sewing Machine Tension Settings
Understanding and adjusting your sewing machine’s tension settings is a crucial step for achieving professional-looking stitches‚ a skill frequently highlighted in comprehensive sewing guides for novices. Correct tension ensures a balanced stitch‚ where the upper and bobbin threads interlock perfectly in the middle of the fabric layers. If your tension is off‚ you might see loops on the top fabric surface (upper tension too loose or bobbin tension too tight) or loops on the bottom (upper tension too tight or bobbin tension too loose). Many beginner tutorials‚ including those that help new sewists gain confidence‚ emphasize this troubleshooting aspect. Your machine typically has a numbered dial for adjusting the upper thread tension. A higher number increases tension‚ making the upper thread pull tighter‚ while a lower number decreases it. When troubleshooting‚ always make small adjustments‚ increment by increment‚ and test on a scrap piece of fabric identical to your project material. This iterative process helps you fine-tune the balance. While most adjustments are made to the upper thread‚ some advanced issues might involve bobbin tension‚ though beginners are generally advised to leave this untouched unless absolutely necessary. Mastering tension adjustment is integral to fixing common issues and ensures your stitches are strong and neat‚ moving you closer to sewing with complete confidence on any project.
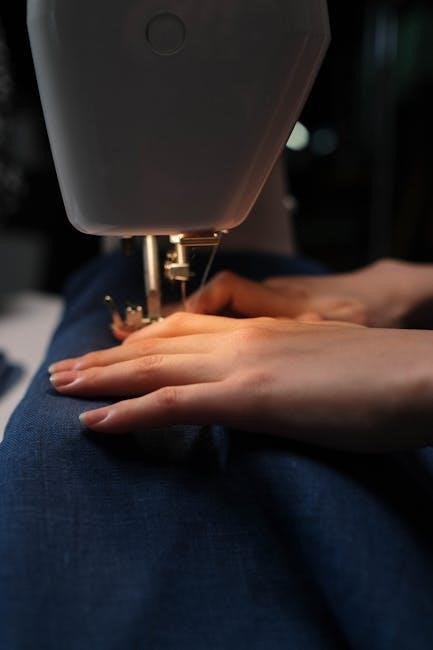
Sewing Your First Stitches with Confidence
Embarking on sewing your first stitches is an exciting milestone‚ marking the true beginning of your journey with the machine. Many step-by-step guides for novices emphasize this moment‚ ensuring you learn to sew easily. After successfully winding your bobbin and threading your machine‚ you’re ready to place fabric under the presser foot. Choose a scrap piece of cotton fabric‚ perhaps a contrasting color for easy visibility of your stitches. Lower the presser foot and carefully turn the handwheel towards you to bring the needle down into the fabric and then back up‚ catching the bobbin thread to form the first loop. Hold both the needle and bobbin threads to the back of the machine as you begin. Slowly press the foot pedal to start the machine‚ guiding the fabric gently with both hands. Focus on maintaining a straight line‚ not pulling or pushing the fabric forcefully‚ but allowing the feed dogs to do their job. Practice sewing straight lines across your fabric‚ gaining a feel for the machine’s speed and control. This initial practice is crucial for building the confidence needed to tackle your first successful project‚ transforming a complex-looking machine into a familiar tool. You’ll master the basics in one afternoon!
The Importance of Backstitching
Backstitching is a fundamental technique that every novice sewist must master to ensure durable and professional-looking projects. It’s explicitly mentioned in many beginner sewing machine tutorials as a crucial step after learning to sew your first stitches. Essentially‚ backstitching involves sewing a few stitches forward at the beginning of a seam‚ then reversing the machine to sew backward over those same stitches‚ and finally resuming forward stitching. This process creates a secure knot of thread‚ locking the seam in place. The same technique is applied at the very end of a seam to prevent it from unraveling over time or with wear. Without proper backstitching‚ even the most perfectly sewn seam can come undone‚ compromising the integrity of your garment or project. This simple yet vital step is what differentiates a flimsy‚ temporary stitch from a strong‚ long-lasting one. Integrating backstitching into your routine from the very beginning will instill good habits‚ providing confidence in the longevity of your handmade items. It’s a core element in achieving a polished finish and is a basic sewing technique you need to learn before you can start making your own clothes. Mastering this ensures your work holds up.
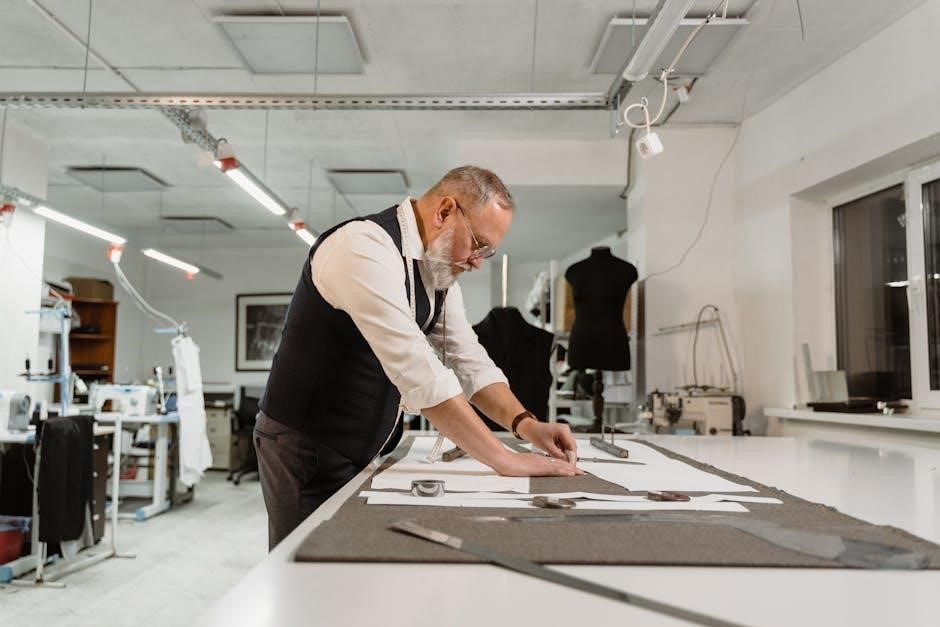
Pivoting Fabric for Corners and Curves
Pivoting fabric is an indispensable technique for any beginner sewist aiming to achieve crisp corners and smooth curves in their projects. This skill is frequently highlighted in sewing guides for novices‚ as it’s crucial for professional-looking finishes. When you encounter a corner‚ like on a pillowcase or a tote bag‚ or need to navigate a gentle curve on an apparel item‚ pivoting allows you to change the direction of your stitching accurately without breaking the thread or creating messy gathers. The process involves sewing up to the desired turning point‚ leaving the needle down in the fabric‚ lifting the presser foot‚ rotating the fabric around the needle to the new sewing direction‚ then lowering the presser foot and continuing to stitch. For curves‚ you might pivot incrementally‚ taking smaller stitches and lifting the presser foot more frequently to gently guide the fabric. This method ensures that your stitches remain even and close to the edge‚ preventing puckering or uneven seams. Mastering fabric pivoting builds significant confidence‚ enabling you to tackle more intricate patterns and designs with precision. It’s a key part of learning basic sewing techniques before starting your first sewing project‚ ensuring clean lines and smooth transitions in all your creations.

Addressing Common Sewing Machine Issues
Even expert tailors sometimes encounter machine hiccups. This section will guide you through understanding and resolving typical challenges. Learning to identify and fix common issues is a vital step in your sewing journey‚ ensuring smoother operation and uninterrupted creativity for all your projects.
Troubleshooting Basic Machine Problems
For beginners‚ navigating sewing machine issues can seem daunting‚ yet comprehensive guides emphasize its importance. Expert tailors confirm that understanding how to fix common problems is crucial for any sewist’s journey. Often‚ what appear to be complex malfunctions are merely basic setup errors. This includes incorrect threading‚ improperly wound bobbins‚ or misadjusted tension settings‚ highlighted in novice tutorials. Learning to diagnose and resolve these fundamental glitches transforms frustration into a confident learning experience. It empowers new sewists to tackle projects independently and effectively. Mastering these foundational problem-solving skills is as vital as learning to stitch. This deepens your machine understanding‚ ensuring a smoother‚ productive creative path. Equipping yourself with troubleshooting knowledge is paramount for aspiring sewists‚ building resilience and independence to overcome any hurdle.
Expanding Your Sewing Machine Skills
Once you’ve mastered the basics‚ it’s time to expand your sewing capabilities. Explore various stitch types‚ delve into advanced construction methods with video tutorials‚ and even consider specialized machines like overlockers to elevate your projects and creative potential further.
Exploring Different Basic Stitch Types
Once comfortable with machine operation‚ exploring various basic stitch types expands your repertoire. The straight stitch is fundamental for seams‚ topstitching‚ and construction. Its adjustable length is crucial; shorter stitches create stronger‚ permanent seams‚ while longer ones are ideal for basting‚ adapting to diverse fabrics and project needs.
Beyond straight‚ the zigzag stitch is indispensable for finishing raw edges‚ preventing fraying‚ attaching elastic‚ or mending. Adjustable width and length provide versatility‚ customizing its function for various materials. Many modern machines feature other utility stitches‚ like a stretch stitch for knits ensuring seam flexibility‚ or a simple decorative stitch. These options expand your machine’s capabilities considerably.
Practicing each stitch type on scrap fabric is paramount for building confidence. This hands-on experience helps you understand precisely how different settings impact the stitch’s appearance and overall strength. Mastering these fundamental stitch types empowers you to confidently select the ideal stitch for durability‚ aesthetics‚ and a truly professional finish in all your creative sewing endeavors‚ moving beyond simple projects.
Are you new to using a sewing machine and eager to achieve professional-looking finishes on your projects? Then an introduction to an overlocker sewing machine‚ often called a serger‚ is a crucial step for expanding your skills. Unlike a conventional sewing machine that typically forms a single lockstitch‚ an overlocker simultaneously trims the fabric edge‚ stitches‚ and finishes it with an enclosed seam‚ all in one efficient pass. This unique capability dramatically enhances the durability and neatness of your sewn items‚ particularly for garment construction.

Overlockers operate with multiple threads—commonly three‚ four‚ or sometimes five—to create strong‚ stretchable seams that prevent fabric from fraying. This makes them incredibly valuable for working with tricky materials like knits‚ which often stretch and unravel when sewn on a standard machine. The differential feed feature on an overlocker also aids in managing fabric without stretching or puckering‚ ensuring smooth results. Learning to use an overlocker allows you to tackle projects with advanced construction methods‚ delivering a superior‚ store-bought quality finish to your handmade creations.
Step-by-Step Video Tutorials for Construction Methods
Step-by-step video tutorials are an invaluable resource for mastering sewing construction methods. These how-to sew videos provide clear demonstrations‚ perfect for any level sewist to learn new skills or refresh classic techniques. A rich library of resources offers comprehensive visual support‚ simplifying complex processes into easily digestible‚ visual steps. Whether a novice building foundational skills or an experienced sewist tackling advanced garment assembly‚ these guides prove crucial. They allow you to pause‚ rewind‚ and follow along at your own pace‚ ensuring precise execution and thorough understanding of each technique. Our community of over 1500 sewists monthly utilizes these detailed instructions‚ significantly enhancing craft and confidence. These tutorials cover common construction methods‚ from basic seams and hems to intricate finishes‚ offering practical‚ actionable guidance for a rewarding and successful sewing journey.

Continuing Your Sewing Journey
To truly continue your sewing journey‚ explore online resources and courses. Free beginner courses‚ like the Treasurie 6-week program‚ offer structured learning at your own pace‚ helping you master the stylish art of sewing with ongoing support and new challenges.
Online Resources and Beginner Courses
Embarking on a sewing journey is exciting‚ and fortunately‚ a wealth of online resources and beginner courses are readily available to guide your progress. For those eager to master the stylish art of sewing‚ platforms offer comprehensive‚ step-by-step video tutorials covering common sewing construction methods. These resources are perfect for any level sewist‚ whether you’re learning new skills from scratch or simply brushing up on classic techniques. Many online communities‚ like those supporting over 1500 sewists monthly‚ provide a rich library of materials‚ fostering a supportive environment for continuous learning.
A fantastic starting point is the Treasurie 6-week free beginners course. This structured program allows you to delve into one module a day or progress at your own comfortable pace‚ making it highly flexible for any schedule. Such online lessons are invaluable for novices‚ providing everything from foundational knowledge to advanced tips. If you’ve always wanted to learn how to sew but never found the right opportunity‚ now is your chance and time. These accessible guides ensure you can continue expanding your skills‚ exploring new challenges‚ and connecting with a vibrant community dedicated to the craft of sewing‚ transforming aspirations into tangible projects with confidence and ease.