
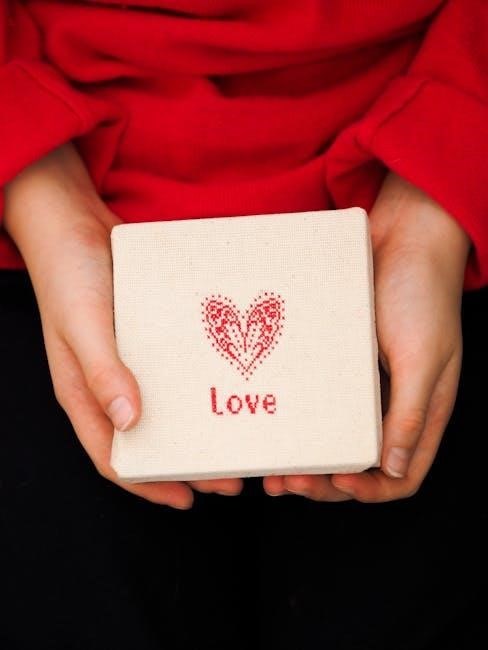
Counted cross stitch is a popular and creative needlework technique that involves following patterns with symbols and colors on fabric to create beautiful designs. It’s perfect for all skill levels and offers a relaxing‚ portable hobby. By focusing on precise stitches and symmetry‚ crafters can bring intricate designs to life‚ making it a rewarding art form for enthusiasts worldwide.
1.1 Understanding the Basics of Counted Cross Stitch
Counted cross stitch is a traditional needlework technique where stitches are made on fabric following a chart. Each symbol represents a color or stitch type. The fabric‚ typically evenweave or Aida‚ is stitched with embroidery floss‚ using 2-3 strands. The process involves creating X-shaped stitches‚ starting from the center to ensure symmetry. Matching the pattern’s center with the fabric’s center is crucial for accurate results.
1.2 Importance of Following Patterns and Charts
Following patterns and charts is essential for achieving accurate and visually appealing results in counted cross stitch. These guides provide clear instructions on color choices‚ stitch counts‚ and placement‚ ensuring your design aligns with the intended artwork. Adhering to the chart helps prevent mistakes‚ maintains symmetry‚ and guarantees a professional finish‚ making it a cornerstone of successful stitching projects.
Step-by-Step Guide to Getting Started
Embark on your cross stitch journey with essential tools and materials. Start by reading charts‚ preparing fabric‚ and finding the center to begin your project confidently.
2.1 Reading a Cross Stitch Chart
Mastering how to read a cross stitch chart is crucial for success. Charts use symbols and colors to represent stitches‚ guiding you to create the desired design. Each symbol corresponds to a specific color and stitch type‚ while the grid aligns with fabric counts. Start by identifying the center point to ensure proper alignment and project size accuracy.
2.2 Preparing Your Fabric and Tools
Start by selecting the right fabric‚ such as Aida or evenweave‚ and gather essential tools like embroidery hoops‚ needles‚ and scissors. Wash and dry your fabric beforehand to ensure proper sizing. Use an embroidery hoop to keep the fabric taut‚ making stitching easier and more precise. Always keep your hands clean to prevent staining the fabric during your project.
2.3 Finding the Center of Your Fabric
To find the fabric’s center‚ fold it evenly in half both vertically and horizontally. The point where the folds intersect is the center. Use this as a starting point for your pattern to ensure symmetry and proper alignment. This method prevents running out of space and ensures your design is centered perfectly‚ making the stitching process more enjoyable and accurate.
Essential Tips and Tricks for Beginners
Keep tension even‚ avoid long thread jumps‚ and start near the center. Clean hands prevent stains‚ and consistent stitching ensures a professional finish. Stay organized for success.
3.1 Starting Near the Center of the Pattern
Starting near the center of the pattern ensures proper alignment and symmetry. It helps avoid running out of fabric space and makes the stitching process more manageable; Identify the center by folding the fabric or using a hoop‚ then begin stitching from this point for balanced results and to maintain even tension throughout your project.
3.2 Managing Thread Lengths and Tension
Keep thread lengths manageable‚ using 12-18 inches for stitching to prevent tangles and knots. Maintain even tension by gently pulling the thread‚ ensuring stitches lie flat without puckering the fabric. Avoid overly tight stitches‚ as they can distort the fabric‚ and keep a consistent touch to achieve uniform results and a professional finish in your cross stitch project.
3.3 Keeping Your Hands Clean to Avoid Staining
Always wash your hands before stitching to prevent dirt or lotions from staining the fabric. Moisturizers and oils can leave residue‚ affecting the fabric’s appearance. Keep your hands clean and dry throughout the project‚ especially when handling light-colored fabrics. This simple practice ensures your cross stitch remains pristine and free from unwanted marks or discoloration.
Stitching Techniques
Mastering stitching techniques enhances your cross stitch projects. Explore methods like the English‚ Danish‚ and Sewing techniques to achieve precise‚ even stitches and beautiful results.
4.1 English Method vs. Danish Method
The English Method involves stitching in rows‚ left to right‚ while the Danish Method allows stitching individual crosses in any direction. The English Method ensures even coverage and reduces fabric movement‚ making it ideal for beginners. The Danish Method offers flexibility and is suited for complex patterns. Both methods yield beautiful results‚ with the choice depending on personal preference and project complexity.
4.2 The Sewing Method for Cross Stitch
The Sewing Method involves moving the needle in a continuous motion‚ stitching multiple crosses in one direction. It minimizes turning the work‚ saving time and reducing strain. This method is efficient for large areas and straight lines‚ making it a favorite for projects with repetitive patterns; It’s also adaptable to both hand-dyed and evenweave fabrics‚ ensuring versatility.
Thread and Fabric Management
Properly managing thread and fabric is essential. Use 2-3 strands of floss‚ keep fabric clean‚ and handle gently to prevent damage and stains during stitching projects.
5.1 Cutting and Separating Embroidery Floss
Cut embroidery floss into manageable lengths‚ typically 12-18 inches‚ to prevent tangling. Separate the strands gently to avoid knotting. Use 2-3 strands for stitching‚ depending on fabric count. Always handle floss carefully to maintain quality and color consistency. This ensures smooth stitching and even thread distribution for your cross stitch project. Keep floss organized using small bobbins or a floss organizer to avoid mix-ups and tangles‚ saving time and reducing frustration during your stitching process.
5.2 Threading Your Needle and Using Strands
Thread your needle with 2-3 strands of embroidery floss‚ depending on fabric count. Gently separate strands to avoid knotting. Use a needle threader for ease. Keep strands moist to prevent tangling. Handle floss carefully to maintain quality and color consistency. This ensures smooth stitching and even thread distribution‚ enhancing your cross stitch project’s appearance and durability over time.

Finishing Your Project
Finishing your project involves securing loose ends and trimming excess thread. Gentle washing and blocking enhance the stitchwork‚ ensuring a professional and lasting finish.
6.1 Securing Ends and Trimming Excess Thread
To finish your project neatly‚ trim excess thread close to the fabric with sharp scissors. Secure ends by weaving them through nearby stitches or fabric. This prevents loose threads from unraveling and ensures a clean‚ professional appearance. Avoid leaving long tails‚ as they can cause stitching to loosen over time. Properly securing ends is essential for maintaining the integrity of your design.
6.2 Washing and Blocking Your Finished Stitch
Gently hand-wash your finished project in cold water with mild detergent to remove dirt and oils. Lay it flat on a clean towel‚ reshaping to original dimensions. Allow it to air-dry completely. Blocking ensures even stitches and a professional finish. Avoid wringing or twisting to prevent distortion. This step enhances fabric lay and stitch appearance‚ making your work look its best.
Using Hoops or Frames
Hoops or frames keep fabric taut‚ ensuring even tension and precise stitching. They help maintain fabric stability‚ making it easier to handle and stitch‚ especially for large projects.
7;1 Choosing the Right Tool for Your Stitching
Choosing the right hoop or frame is essential for counted cross stitch. Hoops are ideal for small projects‚ while frames suit larger designs. Consider fabric size‚ stitch density‚ and personal comfort when selecting. Adjustable hoops allow flexibility‚ and lap frames offer hands-free stitching‚ ensuring even tension and ease of use for a professional finish.
7.2 Maintaining Fabric Tension for Even Stitches
Maintaining even fabric tension is crucial for consistent stitching. Use hoops or frames to keep fabric taut‚ ensuring stitches lie flat and even. Adjust tension regularly to prevent slack or overly tight fabric‚ which can distort the design. Even tension guarantees symmetrical results and a professional finish‚ making your counted cross stitch project look polished and well-crafted from start to completion.

Common Mistakes to Avoid
Common mistakes include miscounting stitches‚ ignoring pattern alignment‚ and using incorrect thread lengths. These errors can lead to misaligned designs and uneven stitching‚ ruining your project.
8.1 Avoiding Long Jumps Across the Fabric
Long jumps across the fabric can cause thread tension issues and visible lines on the front. To avoid this‚ plan your stitching path and use short‚ manageable jumps. This prevents distortion and ensures a neat‚ professional finish. Always bring the needle up close to where the next stitch begins to maintain even tension and avoid loose threads on the back.
8.2 Preventing Misalignment of Stitches
Misalignment occurs when stitches are placed incorrectly‚ ruining the design. To prevent this‚ always count carefully and use the chart as a guide. Start stitching from the center and work outward to maintain symmetry. Use fabric markers to mark key points or guidelines‚ ensuring accurate placement. Regularly check your work against the pattern to catch errors early and avoid costly corrections.

Advanced Techniques
Advanced techniques‚ like fractional stitches and specialty stitches‚ add complexity and detail to designs. They challenge stitchers to think creatively‚ enhancing projects with unique visual effects and precision.
9.1 Working with Fractional Stitches
Fractional stitches involve stitching in spaces smaller than a full cross‚ creating partial X-shapes. They add fine details and curves‚ enhancing intricate designs. To master them‚ use a sharp needle and magnification if needed. Always refer to your pattern chart for accurate placement and follow tips from guides to achieve smooth‚ precise results in your project.
9.2 Incorporating Specialty Stitches
Specialty stitches like backstitch‚ French knots‚ and herringbone add texture and variety to your designs. These stitches are often used to outline or create unique effects. Follow pattern instructions to ensure proper placement and tension. Practice each stitch type separately before incorporating them into your main project to achieve professional-looking results and enhance your cross stitch creations.
Resources for Further Learning
Explore recommended tutorials‚ guides‚ and suppliers for advancing your counted cross stitch skills. Discover patterns and supplies at dedicated craft stores and online platforms for continuous learning and improvement.
10.1 Recommended Tutorials and Guides
Find excellent tutorials on YouTube‚ such as Peacock & Fig’s cross stitch guides‚ and detailed blogs like LoveCrafts’ beginner tutorials. These resources cover basic stitches‚ reading charts‚ and advanced techniques‚ ensuring a smooth learning journey for all skill levels. They also provide tips for managing thread and fabric‚ helping you master counted cross stitch effortlessly. Learn more here.
10.2 Where to Find Patterns and Supplies
Discover a wide range of cross stitch patterns and supplies at craft stores‚ online marketplaces like Etsy‚ and specialty shops such as Stitchery X-Press. Websites like LoveCrafts and Amazon offer extensive collections of kits‚ fabrics‚ and threads. Local needlework shops also provide personalized advice and high-quality materials to suit your project needs.