
Welcome to the GE Portable Air Conditioner Manual. This guide provides essential information for safe installation, operation, and maintenance of your unit.
1.1 Purpose of the Manual
This manual is designed to guide users in safely and effectively operating their General Electric portable air conditioner. It provides detailed instructions for installation, operation, and maintenance to ensure optimal performance. The manual also outlines safety precautions and troubleshooting tips to address common issues. By following this guide, users can maximize the efficiency and longevity of their unit while ensuring a safe operating environment. This document serves as a comprehensive reference for all aspects of the air conditioner’s use and care.
1.2 Importance of Reading the Manual
Reading this manual is crucial for ensuring the safe and efficient operation of your General Electric portable air conditioner. It provides essential safety precautions, installation guidelines, and operating instructions to prevent accidents and maintain optimal performance. By understanding the unit’s features and proper usage, users can avoid potential hazards and extend the product’s lifespan. The manual also includes troubleshooting tips to address common issues, helping you resolve problems quickly and effectively. Adhering to the instructions ensures compliance with safety standards and warranty conditions.
1.3 General Safety Precautions
For safe operation, ensure the air conditioner is used as directed. Avoid exposing the unit to water or installing it near flammable materials. Always use the provided power cord and avoid overloaded circuits. Proper ventilation is essential to prevent carbon monoxide risks. Keep the unit out of reach of children and pets. Regularly inspect the power cord and plug for damage; Follow all electrical safety guidelines to prevent fire hazards. Adhere to the manufacturer’s instructions to ensure optimal performance and safety.

Product Overview
The General Electric Portable Air Conditioner is a versatile, compact cooling solution designed for efficient air conditioning, dehumidifying, and ventilating in various home environments.
2.1 Key Features of the Portable Air Conditioner
The GE Portable Air Conditioner offers 8,500 to 10,500 BTU cooling capacity, designed for efficient temperature control in various room sizes. It features a built-in dehumidifier, remote control operation, and a programmable timer for convenience. The unit includes a window kit for easy installation and venting, ensuring proper airflow. Its compact design allows for mobility, while the top cover and control panel provide easy access to settings. Electrical safety features and energy-efficient modes enhance performance and user safety.
2.2 Components and Accessories Included
The GE Portable Air Conditioner package includes the main unit, remote control, window installation kit, and user manual. The window kit contains adjustable panels and seals for proper venting. Additional accessories may vary by model but often include a drain hose for condensate removal and screws for installation. Ensure all components are accounted for before setup. These accessories are designed to facilitate easy installation and optimal performance of the air conditioner in your space.
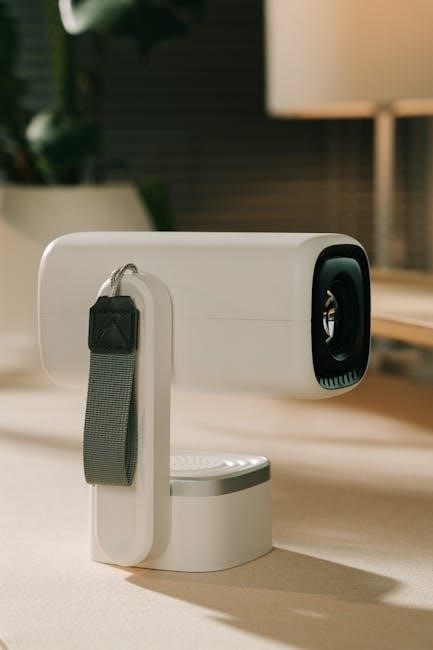
2.3 Understanding the Remote Control Functions
The remote control allows you to adjust settings like temperature, fan speed, and operation modes. It features buttons for power, mode selection, and temperature adjustment. The remote also includes a display for easy monitoring.
When starting the unit, the remote’s green power lamp blinks, indicating startup mode. Ensure the remote is properly paired with the air conditioner for seamless operation. Refer to the manual for detailed button functions and troubleshooting tips to optimize your cooling experience.

Installation Guidelines
Ensure proper installation using the provided window kit for venting. Follow electrical requirements and venting best practices. Refer to the manual for detailed setup instructions and safety tips.
3.1 Steps for Proper Window Kit Installation
- Prepare the window by ensuring it opens horizontally or vertically to accommodate the vent kit.
- Attach the window bracket to the vent hose adapter, securing it tightly.
- Mount the bracket to the window frame, adjusting for a snug fit.
- Connect the vent hose to the air conditioner and the window kit.
- Seal any gaps around the window kit with foam strips to prevent air leaks.
- Turn on the unit to ensure proper venting and operation.
Follow these steps to ensure efficient cooling and safe operation.
3.2 Electrical Requirements and Setup
Ensure your portable air conditioner is connected to a dedicated 115V/120V, 60Hz electrical outlet. Avoid using extension cords or sharing the outlet with other devices. Plug the unit directly into the power source to prevent electrical hazards. Verify that the circuit can handle the appliance’s power requirements. Do not overload the circuit, as this could cause a fire risk. If unsure, consult a licensed electrician. Always follow local electrical codes and manufacturer guidelines for safe setup.
3.3 Venting Options and Best Practices
Proper venting is essential for optimal performance. Use the provided window kit for single-hose setup, ensuring the vent hose is securely connected. Position the vent hose away from direct sunlight and moisture. Avoid kinking or bending the hose, as this can restrict airflow. For best results, vent the unit through a window or sliding door. Do not vent into crawl spaces or attics, as this can lead to moisture buildup. Regularly inspect the venting system for damage or blockages to maintain efficiency and safety.
Operating the Air Conditioner
Start the unit by turning on the power. Use the remote controller to adjust settings. The system initializes, and the remote lamp blinks during startup mode.
4.1 Starting Up the Unit for the First Time
Before starting, ensure the unit is properly installed and connected to a suitable electrical outlet. Turn on the power and use the remote controller to initiate startup. The system will enter startup mode, indicated by the remote’s green power lamp blinking and the “PLEASE WAIT” message. Allow the unit to complete its initialization process. Once operational, you can adjust settings like temperature, fan speed, and mode using the remote or control panel. Ensure all functions are tested to confirm proper operation.
4.2 Using the Remote Control Effectively
To use the remote control effectively, first ensure the unit is turned on. Point the remote at the control panel and press the power button. Use the navigation buttons to adjust temperature, fan speed, and operating mode. The remote allows you to toggle between cooling, dehumidifying, and fan-only modes. Adjust settings to achieve your desired comfort level. For optimal performance, keep the remote within line of sight of the unit and replace batteries as needed to maintain functionality. Regularly test remote operations to ensure responsiveness.
4.3 Understanding the Control Panel Functions
The control panel on your GE portable air conditioner features buttons for power, temperature adjustment, fan speed, and mode selection. The power button turns the unit on/off, while the temperature buttons allow you to set your desired temperature. Fan speed buttons let you choose between low, medium, or high settings. Mode buttons enable switching between cooling, dehumidifying, and fan-only modes. Use these functions to customize your comfort experience. Ensure the unit is powered on before using the control panel. Familiarize yourself with these controls to optimize performance and efficiency.

Maintenance and Care
Regularly clean the air filter and drain condensate to ensure optimal performance. Schedule maintenance to maintain efficiency and longevity of your portable air conditioner.
5.1 Cleaning the Air Filter and Unit
Regular cleaning of the air filter and unit is crucial for optimal performance. Turn off and unplug the air conditioner before cleaning. Use a soft brush or vacuum to gently remove dust from the filter. For stubborn dirt, wash the filter with mild soap and water, then allow it to dry completely before reinstalling. Wipe the exterior with a damp cloth to prevent dust buildup. Clean the condenser coils periodically to ensure efficient cooling and energy efficiency.
5.2 Draining Condensate Water Properly
Regularly drain condensate water to ensure efficient operation and prevent issues. Turn off the unit and unplug it before draining. Locate the condensate water tank, usually at the bottom. Empty it regularly, especially in humid conditions. If equipped, check the drain hose for blockages and ensure it’s securely connected. For continuous drainage, attach the hose to a suitable drain location. Always clean the tank with mild detergent to prevent mold growth. Proper drainage maintains performance and prevents water overflow. Refer to your manual for specific drainage options and recommendations.
5.3 Regular Maintenance Schedule
Perform routine maintenance to ensure optimal performance and extend the lifespan of your portable air conditioner. Clean or replace the air filter monthly to maintain airflow and efficiency. Every 3 months, inspect and clean the condenser coils to prevent dust buildup. Check the drain hose for blockages and ensure proper water flow. Annually, vacuum internal components and check for refrigerant leaks. Schedule professional servicing if unusual noises or reduced performance occur. Refer to your manual for a detailed maintenance timeline and specific recommendations.
Troubleshooting Common Issues
Identify common problems like error codes, weak airflow, or unit not turning on. Check power connections, filters, and drain hoses. Reset the unit if necessary.
6.1 Identifying and Solving Common Problems
Common issues with your GE portable air conditioner may include error codes, weak airflow, or the unit not turning on. Check for power connection issues, blocked air filters, or clogged drain hoses. Ensure the remote control batteries are functional and the unit is properly vented. If the issue persists, reset the air conditioner by unplugging it for 30 seconds and plugging it back in. Refer to the error code list in the manual for specific solutions. If unresolved, contact GE customer support for assistance.
6.2 Understanding Error Codes and Alarms
GE portable air conditioners display error codes to indicate specific issues. Common codes like E1 or E2 may signal sensor malfunctions or refrigerant problems. Refer to the manual for code definitions. If an alarm sounds, check the unit’s display for the error code and follow the troubleshooting guide. Ensure proper ventilation, power supply, and filter cleanliness. If issues persist, reset the unit or contact GE customer support for professional assistance. Always consult the manual for model-specific error code interpretations.
6.3 Resetting the Air Conditioner
To reset your GE portable air conditioner, unplug the unit from the power source, wait 30 seconds, and plug it back in. This process can resolve minor issues like error codes or unexpected shutdowns. Ensure the unit is on a firm, level surface and all vents are clear. If resetting does not fix the problem, consult the error code list in the manual or contact GE customer support for further assistance. Always follow safety guidelines when handling electrical appliances.
Safety Guidelines and Precautions
Ensure safe operation by avoiding extension cords, using proper electrical connections, and keeping vents clear. Never operate near water or flammable materials. Follow manual instructions to prevent hazards.
7.1 Electrical Safety Measures
Ensure the air conditioner is plugged directly into a grounded electrical outlet with the correct voltage rating. Avoid using extension cords or sharing outlets with other devices. Do not overload circuits, as this may cause fire hazards. Regularly inspect the power cord for damage and replace it if necessary. Always follow the manufacturer’s electrical requirements to maintain safety and prevent potential risks associated with improper connections.
7.2 Avoiding Fire Hazards
To prevent fire hazards, ensure the air conditioner is placed on a stable, level surface away from flammable materials. Keep the area around the unit clear of curtains, bedding, or other combustible items; Avoid using damaged power cords or overloaded circuits. Never operate the unit near open flames or sparks. Regularly inspect the unit for proper airflow and ensure the venting system is unobstructed. Turn off the air conditioner when unattended or during extended periods of non-use to reduce fire risks.
7.3 Proper Usage and Positioning
Position the air conditioner on a firm, level surface to ensure stability and proper operation. Maintain at least 12 inches of clearance from walls and furniture for optimal airflow. Ensure the unit is placed away from direct sunlight and heat sources to maximize efficiency. Always use the provided window kit for venting, as improper venting can reduce performance. Keep the remote control within reach for easy adjustments. Avoid placing the unit near water sources or in humid environments to prevent damage.